Turnout design
Straight switches and straight crossing
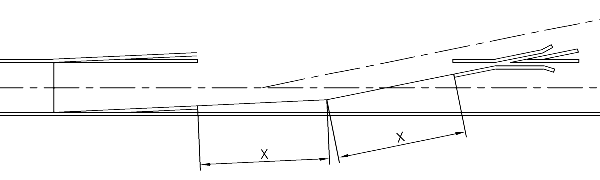
The inner edges of the rail head is extended from the switch and the crossing until they intersect. The lead is adjusted such that the distance from heel of switch to intersection point equals the distance from intersection point to crossing joint (X).
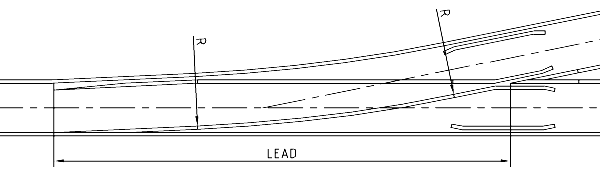
The closure rail curve is laid as a continous curve from the heel of the switch to the crossing joint. This gives the largest possible curve radius R when using the given components. The length of the closure rails must be made to fit this configuration.
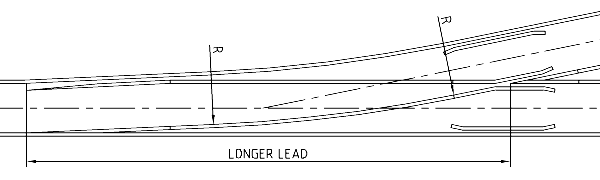
If a standard closure rail length is preferred the lead may be made longer as in figure 3 or shorter as in figure 4. With a longer lead there is a straight section between the heel of the switch and the start of the curve, and the curve radius is smaller than in figure 2.
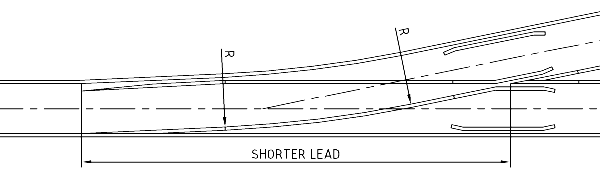
With a shorter lead there is a straight section between the end of the curve and the crossing joint, and the curve radius is smaller than in figure 2.